Castledowns Animal Hospital
  • Home
  • COVID-19 Updates
  • Services
  • Our Team
  • Home Care
  • Petly
  • Pet Memorial Wall
  • Links
    • Emergency
    • Forms >
      • New Client
      • Appointment Request
      • Prescription Refill Request
      • Food Order Request
      • Client Survey
    • Photo Gallery
    • Pet Insurance
    • Pet Loss Support
    • Lost Pets
    • Pet Financing
  • Contact Us
Tips for Treating Your Pet at Home

Preventative home care can be a great benefit to the health of your pet. If you are interested in learning more, here are some helpful tips on common home care maintenance.


Trimming Your Pet's Nails

Trimming your pet's nails does not necessarily have to be a chore. Here are some key things to remember to make the process as stress-free as possible:
  • Start familiarizing your pet with having their paws handled while they are young. Gently massaging their paws will help to show them that there is no reason to fear. Giving treats and affection while handling their paws will also help to reinforce this.
  • There are several different types of nail trimmers available (scissor, guillotine, dremel, etc). Use the trimmer type that is best suited for both you and your pet.
  • If necessary, have a friend or family member keep your pet distracted with treats and/or affection, or have them hold your pet steady. Holding behind your pet's elbow will prevent them from pulling their leg away from you while you are trimming. 
  • The outer surface of the nail does not have any feeling or blood supply. The inner area, called the "quick", contains nerves and blood vessels. If the quick is cut, the nail will start to bleed.For dogs, as the nail is trimmed shorter, the quick will start to become visible and can avoid being cut.
    • If you happen to accidentally cut a nail too short and it starts to bleed, putting some flour or corn starch on the nail may help to stop the bleeding. 
  • Since cat nails are retractable, gently squeeze each toe to expose the nails. The pink quick can be easily seen, and the nail should be cut approximately 2-3 mm from the quick.
  • If your dog has light nails, the pink quick can be seen before trimming the nail. It does, however, extend further than it seems, so begin by trimming the tip of the nail and slowly work your way closer to the base. 
  • For dogs with dark nails, the quick is black, and cannot be seen until you start to trim.
  • No matter the colour of your dog's nails, when you are approaching the quick, it will show as a circle or moon shape in the middle of the nail, and will feel soft. This is the stopping point.


Securely Towel-Wrapping Your Pet

If you have a particularly wiggly pet, you may need to learn the burrito (also called "Purr-ito") technique in order to safely secure them for treatment.
  • Begin by having your pet lay down on the towel with the longer ends of the towel extended completely on each side of your pet. 
  • Keep one hand on your pet's back and wrap one side of the towel fairly tight all the way over your pet with the other hand. Ensure to include their front legs inside the towel.
  • Using one hand, keep the first fold snug against your pet and use your other hand to fold the opposite side of the towel over them. Make sure that the towel is tight enough around the neck that your pet cannot get their front legs out of the towel, but not so tight that it restricts breathing. (If you are trimming your pet's nails, one leg can be left outside of the towel when wrapping to allow easy access. Ensure to keep the towel snug behind the elbow so that they cannot pull their leg back inside the burrito).
  • The back end of the towel can be folded underneath your pet to keep them from backing out of the towel.

Cleaning Your Pet's Ears

 If your pet has had ear infections/issues before, or is a breed that may be predisposed to ear infections/issues, routinely cleaning their ears at home may prevent or slow these problems from happening in the future.
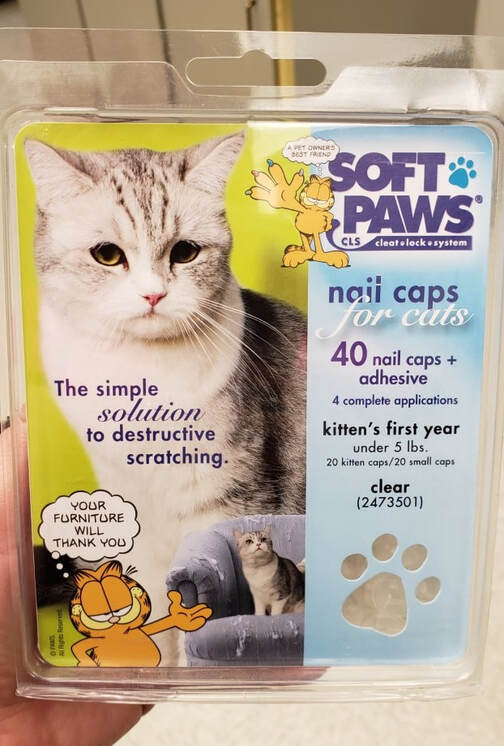
  • You may want to begin by wrapping your pet in a towel or blanket. This will help to keep them from moving, and it may prevent any ear cleaner residue from getting all over them!
  • Beginning by lifting the ear flap (pinna) and gently guiding it up and away from your pet's head. This will help to open the ear canal. Your pet will most likely want to shake their head during the ear cleaning, and gently holding the ear flap during the procedure will help to stop this.
  • Instill a generous amount of ear cleaner into your pet's ear canal (near the base of the opening), then gently massage the base of your pet's ear to help distribute the ear cleaner into the entire ear canal. 
  • Use a cotton gauze or similar material to gently wipe away any debris that the solution loosened. You can use your finger to guide the gauze into the crevices of your pet's ear, but do not insert it deeply into the canal. 
  • Do not use a Q-Tip or swab to clean out your pet's ears. Inserting these into the canal may cause damage. 
  • You may have to repeat this process several more times before the ear is clean.

Applying Soft-Paws

Some cats have a tendency to scratch furniture or carpet despite having multiple scratching posts, trees, or cardboard scratching areas in your home to exercise this natural behaviour. Applying Soft Paws, which are vinyl nail caps that are glued on to your cat's claws, is an excellent way to save your household from scratch marks. Soft Paws come in many different sizes and colours, are relatively easy to apply, and will usually last 1-2 months.
  • You may need to begin by wrapping your cat in a towel to help minimize movement while you are working on each paw and/or have a friend or family member assist you. 
  • Extrude the nail by gently pressing on the top and bottom of each toe, and trim it so that the entire nail will fit into the cap when extruded (See "Trimming Your Pet's Nails" at the top of this page for tips). 
  • Fill the Soft Paw cap 1/3 full with the glue provided and gently squeeze the cap to evenly distribute the glue.
  • Extrude your cat's nail and slide the cap over the nail. 
  • Allow the glue to dry for five minutes without your cat trying to remove the Soft Paws by distracting them with toys, food, or affection.
Picture

Administering Oral Medication

Giving oral medication at home can often be as easy as hiding a pill in your pet's food or their favourite treat. However, some pets can present more of a challenge!  If you have a picky eater and need to physically pill your pet, use these simple tips:
  • You may need to begin by wrapping your pet in a towel to minimize movement, or have a friend or family member assist you by gently restraining your pet.
  • While holding the pill in your dominant hand between your thumb and forefinger, place your other hand over the top of your pet's mouth, gently grasping each side of their mouth at the lips.
  • Tilt your pet's head upwards. This helps to relax the jaw, which makes opening their mouth easier. Use your dominant hand to guide the lower jaw open. 
  • Quickly place the pill at the back of your pet's mouth, behind the hump of the tongue. If the pill is placed too far forward, your pet will be easily able to manoeuver the pill and spit it out. 
  • Shut your pet's mouth and gently stroke their throat, blow on their nose, or chase it with a very small amount of water given by syringe or spoon until they swallow. 
  • Give your pet a treat afterwards for a job well done!

Giving a Subcutaneous Injection

Some pets need medication or fluids given subcutaneously (under the skin). Though this may seem overwhelming at first, a comfortable routine can easily be established by you and your pet. Subcutaneous medication/fluids can be given nearly anywhere that your pet has loose skin, but it is easiest to learn by using the scruff (the skin located over the shoulder blades). Always use a new syringe/needle to reduce the chance of infection and contamination.
  • Begin by ensuring that the dose of medication/fluids is ready to be given. Fluids are administered by gravity so the higher the bag is hung the faster the process will go.
  • Place your pet in a location where they will be comfortable (lap, table, chair, etc). You may need to ask a family member or friend to help to gently hold your pet in place during the procedure.
  • By giving your pet ample attention and/or treats before, during and after the treatment, your pet will associate the process with these rewards and hopefully come to enjoy this routine!
  • Use your thumb and other fingers on your non-dominant hand to gently grasp your pet's skin. Pull upwards to create a skin tent.
  • Hold the syringe/needle parallel to (in line with) your pet's spine, and gently insert it into the skin tent. 
  • If you are using a syringe, draw back on the plunger and ensure that no blood has entered the syringe. If you see blood inside the syringe, this means that you are inside a blood vessel and not under the skin. Remove your syringe and start again. If no blood is seen, inject the medication.
  • Remove the syringe/needle after the medication/fluids have been given. 
  • Ensure that the medication was given properly by checking to make sure your pet's fur is not wet at the site of injection.
  • If you are giving fluids to help with your pet's hydration, it is normal for a small amount to escape after administration. This can be reduced by placing a finger over the injection site for a minute or two after administration, and gently applying pressure as you remove the needle. 

our Location

10223 164 Ave NW,
​Edmonton, AB  T5X 3C9

Hours of Operation

​Monday: 8:30 am - 6:00 pm
Tuesday: 8:30 am - 6:00 pm
Wednesday: 8:30 am - 6:00 pm
Thursday: 8:30 am - 6:00 pm
Friday: 8:30 am - 6:00 pm

Saturday: 9:00 am - 3:00 pm
Sunday: Closed
Please note that we are closed all statutory holidays and all Saturdays during long weekends.
VISIT US AT:
Picture
Picture
Picture

Site powered by Weebly. Managed by IDEXX Laboratories
  • Home
  • COVID-19 Updates
  • Services
  • Our Team
  • Home Care
  • Petly
  • Pet Memorial Wall
  • Links
    • Emergency
    • Forms >
      • New Client
      • Appointment Request
      • Prescription Refill Request
      • Food Order Request
      • Client Survey
    • Photo Gallery
    • Pet Insurance
    • Pet Loss Support
    • Lost Pets
    • Pet Financing
  • Contact Us